1. Caliper Problem Symptoms
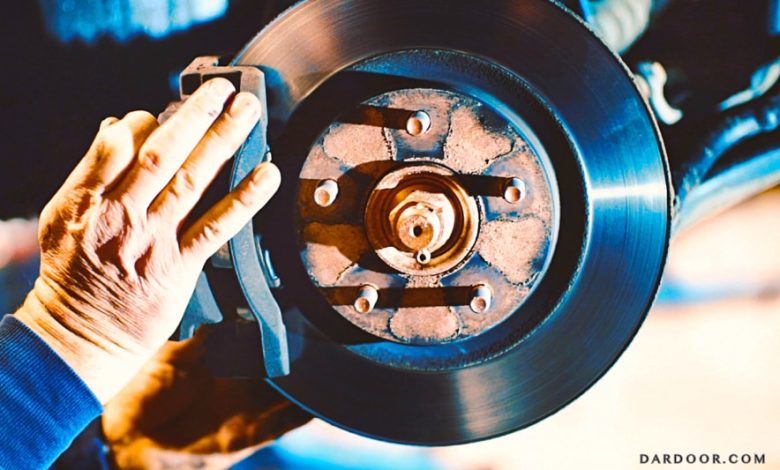
Signs your brake calipers may need rebuilding include:
- One wheel braking harder or hotter than the others
- Vehicle pulling to one side during braking
- Brake drag—pads remain in contact even when brakes are released
- Spongy pedal, uneven pad wear, or overheating
- Leaking brake fluid around caliper seals or pistons
2. Tools & Parts Required
Gather these items before starting:
- Brake caliper rebuild kit: pistons, O‑rings, seals, boots
- Brake fluid DOT 3/4 (OEM spec), clean container
- Compressed air for blowing out passages
- C-clamp or piston retraction tool
- Brake cleaner, lint‑free cloths
- Brake lubricant for slide pins and pad contact points
- Caliper guide pin socket, torque wrench
- Bleeder hose and catch bottle for bleeding
Refer to the OEM part numbers and rebuild kits via Dardoor’s Brake Caliper Diagram.
3. Safety Preparations
- Park vehicle on level ground; chock rear wheels and apply parking brake
- Wear safety glasses and nitrile gloves to avoid fluid contact
- Bleed brake system rather than opening master cylinder on sloped surfaces to prevent air ingestion
- Ensure workspace is clean and well-lit
4. Disassembling the Caliper
- Remove wheel and brake pads
- Unbolt caliper from mounting bracket carefully
- Clamp piston inward slightly to reduce pressure
- Pressurize caliper inlet while slowly decompressing piston with compressed air until it pops out
- Remove sliding guide pins, boots, springs, and retainers
5. Cleaning & Inspection
- Clean all parts with brake cleaner and check for pitting, corrosion, or scoring on piston surfaces
- Inspect caliper bore for wear—if deep grooves present, caliper may need replacement
- Ensure sliding surfaces and bleed valve threads are free of debris and rust
6. Seal & Boot Replacement
- Lubricate new O‑ring and piston seal with clean brake fluid and seat into bore
- Install dust boot and guide pin boots properly over the seal lips
- Insert new spring clips or anti-rattle springs if included in kit
7. Reassembly & Lubrication
- Insert piston carefully, using gentle pressure—ensure seal doesn’t pinch
- Apply brake lubricant to guide pins and insert boots ensuring smooth sliding action
- Reinstall bleeder screw and cap; double-check for leaks
8. Bench Bleeding Procedure
Bleeding the caliper before installation prevents trapped air:
- Clamp caliper upright
- Fill caliper with clean brake fluid via inlet port
- Use tubing from bleeder screw back into the reservoir bore until bubbles cease
- Tighten bleeder screw securely
9. Caliper Installation Steps
- Reinstall caliper onto rotor and bracket, aligning bolt holes
- Compressed fluid may rise; ensure sufficient brake fluid reservoir level
- Attach brake hose, ensuring no twists or damage
- Reinstall brake pads, anti-rattle clips and secure with retaining pin
10. Torque Specs & Final Brake Bleed
- Tighten caliper mounting bolts to OEM torque values (see Dardoor’s Brake System Torque Specifications)
- Seat the bleeder screw firmly
- Bleed the brake system at wheel caliper to remove all air—use pressure or vacuum bleeding technique
- Confirm firm pedal and consistent braking action
11. Preventive Maintenance Tips
- Inspect and rebush guide pins every 12 months or during pad changes
- Lubricate slide pins to prevent caliper sticking
- Flush brake fluid every 2 years or per OEM schedule
- Monitor pad wear and rotor condition during service intervals
Use OEM-recommended brake fluid and caliper hardware via Dardoor’s part catalog.
12. Frequently Asked Questions
Q: How can I tell if a caliper is rebuildable?
If piston surfaces are smooth and bore is free of deep grooves, rebuild kits can restore function. Excessive pitting or stuck pistons may require caliper replacement.
Q: Can I reuse old guide pins or seals?
Seals should always be replaced. Re-bushing old guide pins is possible if surfaces are smooth—otherwise replace.
Q: Should ABS components or parking brake actuators be serviced separately?
Yes—ABS modulator and electric parking brake cylinders may require separate flushing or replacement; refer to Dardoor’s OEM repair guides.
13. Conclusion & OEM References
Rebuilding brake calipers is both economical and effective when done properly. Using OEM rebuild kits, correct procedures, and torque specifications ensures restored braking performance and safety. With attention to detail at each step—from cleaning to bench bleeding—you can achieve professional-level results.
Be safe, be precise, and ensure your brakes stop you when it counts. Happy rebuilding!